2015. július 20., hétfő

CNC Motor Driver 12. - Front Panel design finished

As I promised my previous post, I made some tweaks on the front panel schematics. To be precise, connected the push button of the rotary encoder to the MCU. This gives me the flexibility to use the rotary encoder to navigate in some kind of menu system (if I write some code for it), able to eliminate the additional physical controls (mode switch, calibration switch), and provide the possibility to add more function. Here is the modification of the schematic drawing (actually I can't insert the full page here - lack of resolution of the computer where I'm writing this actually. All of the drawings can be downloaded from the github repo)

I think, the current schematic will be the final one, if I don't find any additional problems with it. So I designed the board:


And ordered it form the dirtypcbs.com
Waiting to arrive...

2015. július 17., péntek

UV Lightbox 18. - Display build - Success? Failure?

I designed...


etched...


and built a new display panel:


I wanted to do this, because I really didn't liked the original one. Too thin PCB lines what barely survived the etching (even my masking technique advanced since), the buttons are to close to each other, the display is not fitted tightly enough, the connector was in the wrong place.

I tested it. Works...


...but I can't call it a complete success. As you can('t) see the display is so dim, that it is almost invisible.

I know the reason why. It dated back in a few years. Let say five years ago, I wanted to build something. I bought a LED display and some drivers to it. The build didn't happened. To be honest I don't even remember, what was it. The LED display left in my drawer.

When I started to build this lightbox, I was thinking, that is a good idea to use the display from the drawer. It is a HDSP-B09G display from Avago (formely Agilent (formely HP)). As I figured out this is a real old design, with low intensity LEDs.

When I realized, this is a crap, I started to search something with the same pin configuration. The result is NULL - except Avago's minimally newer HDSP-B03E. I'm not confident, that this one is really brighter.

So I've two choices:

  1. Try to buy and use the "brighter" Avago
  2. Redesign the display once more, and create a new board (Nooooooooooooo!!!!!)

So I order the Avago display, and we will see.

2015. július 8., szerda

UV Lightbox 17. - Restarting the project

This project was put on the side for a year now. Mostly because of the following factors:

  • Haven't found a good solution for the cover and the top glass/plexy
  • Needed to create the inserts for the back panel and as the CNC died, my intention to do it, died with it
  • I didn't liked the result of the woodwork

About the glass/plexy:
The problem I had with it, what kind of glass/plexy/etc. should I use on the top of the LEDs to be able to allow the UV light to go through it. Even I scored a UV integrator on the eBay (for ~$20) to be able to measure the performance of the LEDs through the chosen material.
Around two month ago an idea pop into my mind that I was thinking in the wrong way all the time.

What if I turn the whole thing upside down?

  1. I don't need any material between the LEDs and the mask.
  2. When I put the mask on to the work piece I can see the alignment, not just guess it.

Now the next step is designing and building a new enclosure. Even I went further with the thinking. I put the whole thing into a flat closed box (without an lid what can be opened) and add a drawer for the work piece. This way it occupies less space, because I can put things on the top of it.

Than I designed a new enclosure:


I've turned the lighting boards from the bottom to the top, added two drawers. The upper one keep the board during the processing, the lower one is just a drawer for copper clad boards - I'll store them there.
Now I have to disassemble this design into its components to be able to manufacture. The question what I can't answer right now, if I'll cut the pieces myself, or order it somewhere.

2015. július 7., kedd

Tons of prizes

There was a new round at Hackaday.io. This time it was based on the sponsor components used. All of the semiconductor manufacturer sponsors - namely Texas Instruments, Freescale, Microchip and Atmel had a list. 50 projects from each list (altogether 200 prizes) was awarded.
As my lucky days continues, I won the following:
A Stickvise (this is my third one):


Two Bluefruit LEs:


A Mooshimeter:


A Cordwood puzzle:


And a TV-B-Gone Kit:


I still encourage you. Post your projects! Many stuff is still waiting in the following rounds.

2015. július 2., csütörtök

USB Booster 1. - Faliure no 2.

It was a while I wrote about this project. Here I'd like to summarize what happened.

First Design - Fail

I designed and built a circuit based on the MCP1642:


Unfortunately some of the components not really fitted in, so some tweaking/parts changing was necessary. With some load it not really looked working, finally I realized the cause:


My mistake, component manufacturers insanity (my opinion).

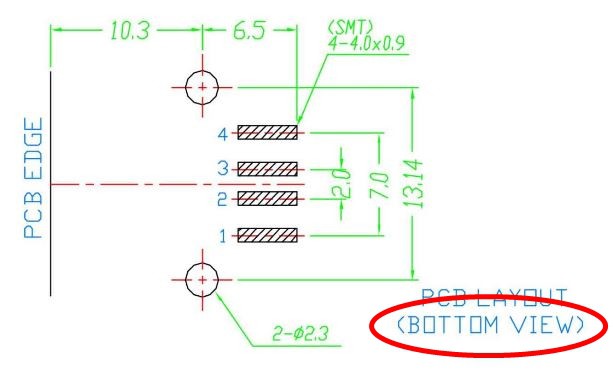
I was not even dream of, that somebody put a PCB layout of a surface mount component from bottom view. When I created the Kicad module from the datasheet, I didn't checked this "BOTTOM VIEW" note on it. So the component was connected in the wrong direction.

So the regulator works, just the whole board useless.

PCB rediesign, rebuild...

Second Design - Fail

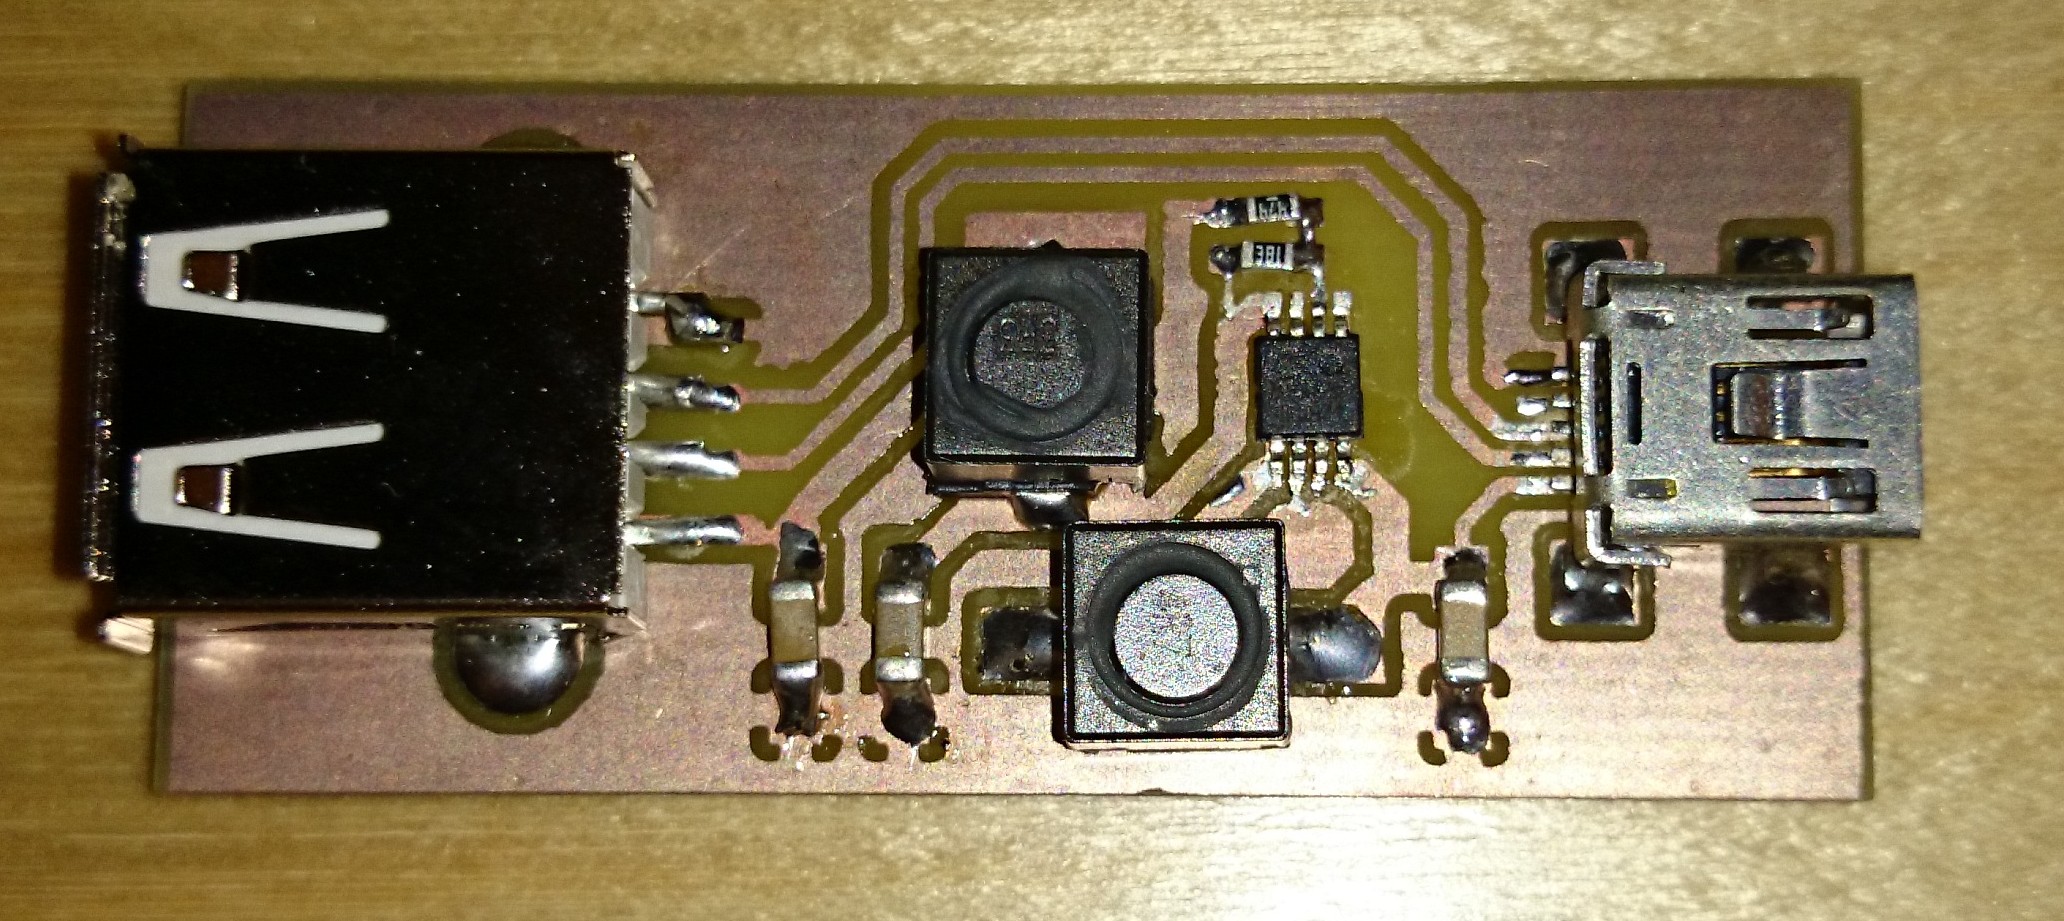
Created a second board, now with the corrected USB connector pinout:


And I built it:

The problems started here.
The first thing, I wanted to test it. To test it it is not enough to connect it to some random USB source. I wanted a variable source.
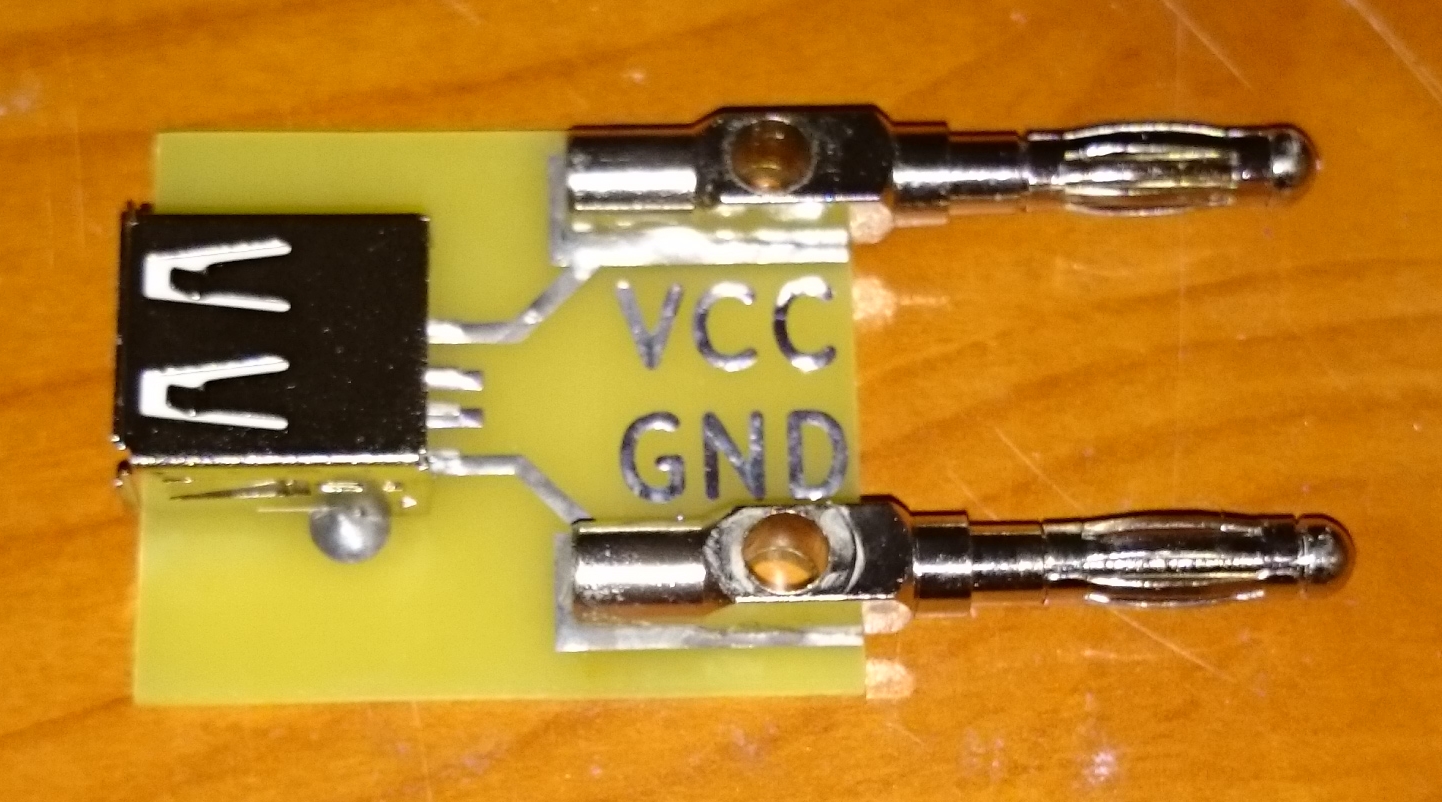
I've a lab supply, but it has no USB out. As I didn't wanted to cut any USB cables, I designed and built this small "tool":


After this the testing went to a complete disaster.
1. It was working from ~2V to 4.3V correctly, but when I went above 4.3V the output voltage just went above 5V. I was thinking this can be the result of miss of the minimal load, what usually required. So I setup the circuit with some (~50mA) load:


Testing..
At 2.0V:

Looks good

At 4.3V:


Still looks good

At 4.4V:


Not so good anymore. :-(

In addition, if I change the voltage, sometimes the whole circuit gets unstable. So the result clearly useless.
I've possible explanations to the things above:
- I've a crap layout - I'll try to enhance it in the next version
- I've some sort circuit(-is) things in my build. I can admit that using solid groundplane around the surface mount inductors without insulating solder mask wasn't my best idea
- The boost regulator is unable to handle the >4.3V in 5V out situation even if the datasheet just said Vout>Vin as a requirement

Here are the possible solution for the next try:
- Create a new board, with different layout and definitely with a cutout in the groundplane around the inductors
- Use the pass trough capability of the chip (this will require some kind of external comparator)
- Use a different (buck-boost or SEPIC) circuit - I may try the LM2621 what I ordered already for one of my other projects
- Keep the current boost converter (rising the output voltage to - let say - 6 volts) and use it as a pre-regulator for an LDO.