2024. október 26., szombat
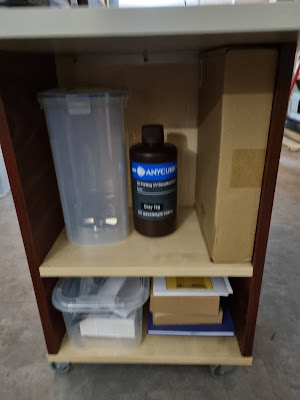
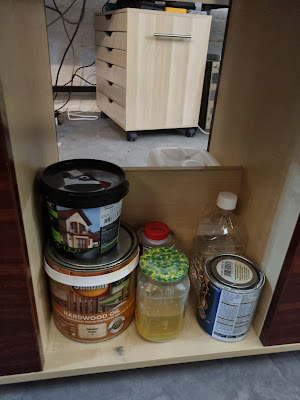
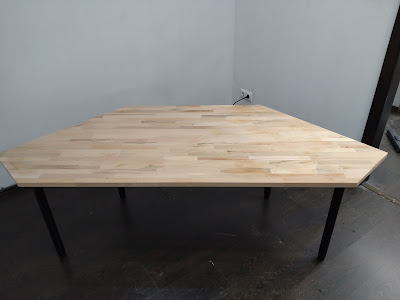
Reorganizing lab 7.
2024. október 9., szerda
Reorganizing lab 6.
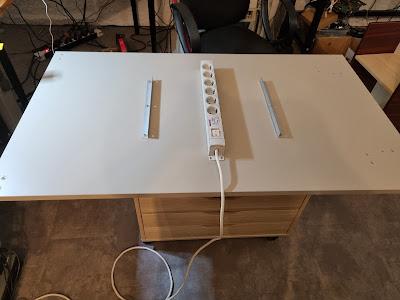
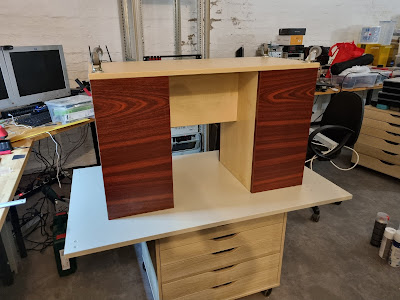
The project of rebuilding my tables are finished.
I still try to figure out what goes where but it is not as messy it was a few days ago.
I think it is time for picking a new project while still moving my stuff.
2024. szeptember 29., vasárnap
Reorganizing lab 5.
The good:
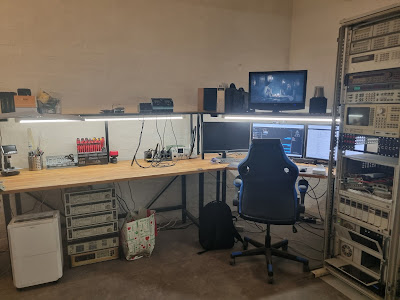
How it looks like Today. Three out of four tables complete. Even my lab computer is its final location. Currently I'm writing this on that computer.2024. szeptember 27., péntek
Reorganizing lab 4.
2024. szeptember 17., kedd
Reorganizing lab 3.
2023. augusztus 27., vasárnap
Dumpster Dive - "woodwork"
2022. március 13., vasárnap
New workshop 3.
In almost all of my free time on the last week, I worked on the lab benches. Sanded, drilled, oiled, built.
Here is the result:
Unfortunately, it is far form the end. But at least some progress.
At the long weekend I plan to move some things down, and also start to work on my big rack cabinets I have already.
2022. március 2., szerda
New workshop 2.
Back in December I wrote about my new workshop. It is basically a cellar I rented from the local municipality. It was in horrible condition.
More than two month elapsed since. It looks much better now.
The the broken concrete pillars repaired, the walls painted, and it got an antistatic PVC floor.
I decided to have self made desks. Fortunately I was so lucky to find 200x80x2,7cm beech tables for ~$100 each (the todays wood prices become nightmare). The plan is to have four desks. One for soldering, microscope, one corner desk for computers, one for measurements and instruments, one for mechanical work (to be honest knowing myself it will generate ~7m2 desk area to fill with mess 😂).
Bought also steel workbench legs. The desks will only be cut (just the corner unit), sanded and oiled.
Currently the corner desks wait for oiling (cutting and sanding is done).
And the legs are assembled for the rest of the desks:
This is the current status, I'll continue, when I've time for it.
2015. július 8., szerda
UV Lightbox 17. - Restarting the project
- Haven't found a good solution for the cover and the top glass/plexy
- Needed to create the inserts for the back panel and as the CNC died, my intention to do it, died with it
- I didn't liked the result of the woodwork
About the glass/plexy:
The problem I had with it, what kind of glass/plexy/etc. should I use on the top of the LEDs to be able to allow the UV light to go through it. Even I scored a UV integrator on the eBay (for ~$20) to be able to measure the performance of the LEDs through the chosen material.
Around two month ago an idea pop into my mind that I was thinking in the wrong way all the time.
What if I turn the whole thing upside down?
- I don't need any material between the LEDs and the mask.
- When I put the mask on to the work piece I can see the alignment, not just guess it.
Now the next step is designing and building a new enclosure. Even I went further with the thinking. I put the whole thing into a flat closed box (without an lid what can be opened) and add a drawer for the work piece. This way it occupies less space, because I can put things on the top of it.
Than I designed a new enclosure:
Now I have to disassemble this design into its components to be able to manufacture. The question what I can't answer right now, if I'll cut the pieces myself, or order it somewhere.
2015. június 11., csütörtök
Expandable breadboard
What if I cut a breadboard into it's two half, mount it on a pair of sliders and slide to the position where the board fits in keeping the four holes for each pin accessible:
2014. június 12., csütörtök
UV Lightbox 16. - Woodwork continues
Thanks to the CNC router here are the holes on the backplane:
Ready for lacking:
After the first layer:
2014. május 13., kedd
3D toolchain - bitmap
How will a bitmap image (in our case a jpg) to turn to a usable result.
When I started to work on it it was obvious that I'll need to following elements:
Some image manipulation software. For this I use paint.net for years. I was thinking it will be sufficient here. I need it to setup the parameters (contrast, brightness, sizing, etc.) of the source image.
I need something what is able to turn raster image to vectors. Looking around I fond the InkScape because it is able to export to CAD format (like DXF) and it's free.
I need a CAM software indeed. I was fighting a lot with the HeeksCNC, so I'll check if I can use it for the task.
Here is the source what will be the starting point:
For first trial I thought that no modification is needed on it. Looked around the net to find out how can I convert it to vectors with the InkScape.
Loaded it into the InkScape and given an A4 size for reference. After this I used the Path/Trace function it with the original settings. It created a vector format. There was a recommendation about the Simplify function, but it wasn't working correctly on this image.
I saved the result and given to the HeeksCNC.
The thing was known to me that I need pocket operation for the letters and profile for the edges. The thing what I wasn't know how to leave out the "islands" of the e and a letters. After a long struggling I found the solution. The two sketches must be combined after the island sketch order changed to counter-clockwise.
Its finished (as I believed)
I went with the finished file to the machine. I started a dry-run (the spindle switched off, no cutter bit installed). First it stated that I've no tool on the tool table in the 4th position. Ok, I created one for the 4.8 mm cutter in the LinuxCNC. Secondly it stated that I'm out of the dimensions. Looked into the G-Code, one of the values in the beginning was someting above 500mm movement. And yes, I don't fit in. This is fundamentally bad.
Back to the InkScape. Now I tried to put the image to the A4 sheet watchfully. I wasn't able to do it correctly. From the page settings I found out that the whole thing works with 90dpi. This is a fixed value. The dpi value of the source image doesn't count.
Opened the paint.net and resized the image to 20x20 cm and 90dpi. InkScape once more. It looks good. I created the vector format. Instead of the svg used before I saved it in dxf.
HeeksCNC. I went through the process with checking the sizes. Not good. The coordinate system is not in its place. Recreated it in InkScape with care of the origin point what should be at the lower left corner (I already know this step was unnecessary, because the HeeksCNC is able to move the object into its place with a well done transformation).
Back to the machine. I reconfigured the machine itself. I set that the whole size should be available both in the positive and the negative scale. This gives me the freedom to put the origin at a given job anywhere I like.
Starting to set the origin. I found out that the X axis works in the reverse direction (my guess is it is a reverse connection problem in the hardware). Back to the mahine configuration. Reverse the X axis polarity from software.
Now it's good. Dry run starts correctly. Material tighten, cutter bit in place, spindle to full throttle. Lets run...
And the result after a few hours:
2014. március 11., kedd
3D - Printing, miling, etc.
But this is not the only way of 3D manufacturing, even it is not my only desire in the 3D world. I'm thinking about several things for a while.
The story begins sometime ago when I bought a drill stand for my Bosch hobby drilling machine.
I needed this because without it is almost impossible to drill PCBs. Shortly after this I started to think about a compound table. Even it was available for my drill stand.
Finally I not bought it.
Struggling with drilling and cutting with various enclosures are still a continuous issue.
Then came in my mind to step forward and purchase something what is able to mill - let say - aluminum.
I fount a machine to name it a Proxxon MF-70 miller.
It may suitable to part of my tasks, I was planing and looking around the available purchase sources, but it not came to the reality.
I had the possibility to build a CNC miller in my head for a while. But I was unwilling to start this project because I don't have even a bit of the required knowledge.
Once I collected my requirements against a CNC miller.
Here they are:
Drilling and milling PCBs:
If I can do this largely simplify and accelerate my life.
I think about something like this:
- I need to work with less chemicals.
- At least partially solve my problems with the two sided PCBs.
- Eliminate the slow inaccurate hand drilling
- The result will be a more precise PCB (with my current prototyping process I faced already that I'm unable to solder a DIP-40 package because of the missing accuracy)
Old desire of me to create professional face/back plates. It would be nice if I could create the standard 44cm Hi-Fi size. If it smaller a little bit, it is not a real problem, just I will not be able to drill the whole area.
Drilling and milling wooden parts:
- I was struggling a lot with the wooden frame of the UV lightbox and still not finished it.
- There is the "GainClone" what needs wooden parts.
- I have additional countless ideas in my head what needs wooden parts.
For example some acrylic engraving come in my mind.
If I collected this list I started to look around to find a machine fulfill my needs. I found a good looking one called ShapeOko.
The site where it is (not)orderable, provide a handful of options. I collected what I need. Before ordering I went to the Hungarian HobbyCNC forum with my needs and this machine to ask the opinion, if this fits to my needs. So mainly they laugh on me. To be fair not laugh on me, but correctly explained to me why to forget it. The conclusion: The structure is not reinforced enough for the size I want, the belt drive is not precise enough. I need a trapezoidal spindle, but more over ballscrew drive.
I got recomendation, what to build. I started to collect the knowledge, the material sources, even I almost started to draw a mechanical plan.
Finally I looked inside: What am I doing right now?
MAN! YOU DON'T KNOW ANYTHING ABOUT THIS!
I fall back to the ShapeOko with a thought in my mind "the guys who designed and built this can't be that stupid" it should be sufficient for my personal needs.
I would order it, but the "MakerSlide" not available for several month, and I just see the continuous promise "the next week".
On this weekend I come across this Chinese machine:
Ballscrew drive, serious milling tool (not a hacked in Dremel like something), PC based control (instead of the beloved magnificent Arduino) 4th axis option, etc.
If I put together the price of the (not)orderable ShapeOko it become around the price of this machine. The only drawback I found that instead of the desired 44cm length it can handle only 39, but this compromise I willing to take.
One last question left: Where to order from? eBay/AliExpress form Hong-Kong or from the Hungarian reseller. Because, yes I found a such (but far above the Chinese price):
http://www.variometrum.com/index.php?route=product/product&path=78&product_id=137
2014. február 19., szerda
2014. február 10., hétfő
UV Lightbox 14. - Sections from the woodwork
Based on this it is just ugly from inside:
From outside it looks quite nice:
The pencil drawing is still there and the holes for the buttons are missing.
The standing:
- All parts of the frame already cut to its sizes
- The hole for the display almost finished
- The base plate finished
- All of the light panels, the power supply, and the mains transformer screwed in.
- Almost all of the cables in its place
(pictures comes later)
The things are missing:
- The butttons of the display and the holes for it
- Plugging of the frame
- The holes for mains connector and the controller's plugs
- The metal parts tightens the base plate for the frame
- The acrylic bench
- The tightening guides for the bench
- The top cover and the hinges for it
- Tightening the controller to the base plate
- Sanding and varnishing
- Writing the article :-)


