A következő címkéjű bejegyzések mutatása: Kid electronics. Összes bejegyzés megjelenítése

2023. március 23., csütörtök

VU Tower

I have children (a boy and two girls).

I always have in mind to connect my hobbies to my family. It not always turns the way I'd like, but not this time. For precious moments time-to-time I make presents myself. Like the repurposed radio for my mother for Christmas.

During the last weekend was one of my daughter's 14th birthday. She is moving to party age soon. What would be better than something with lights connected to music.

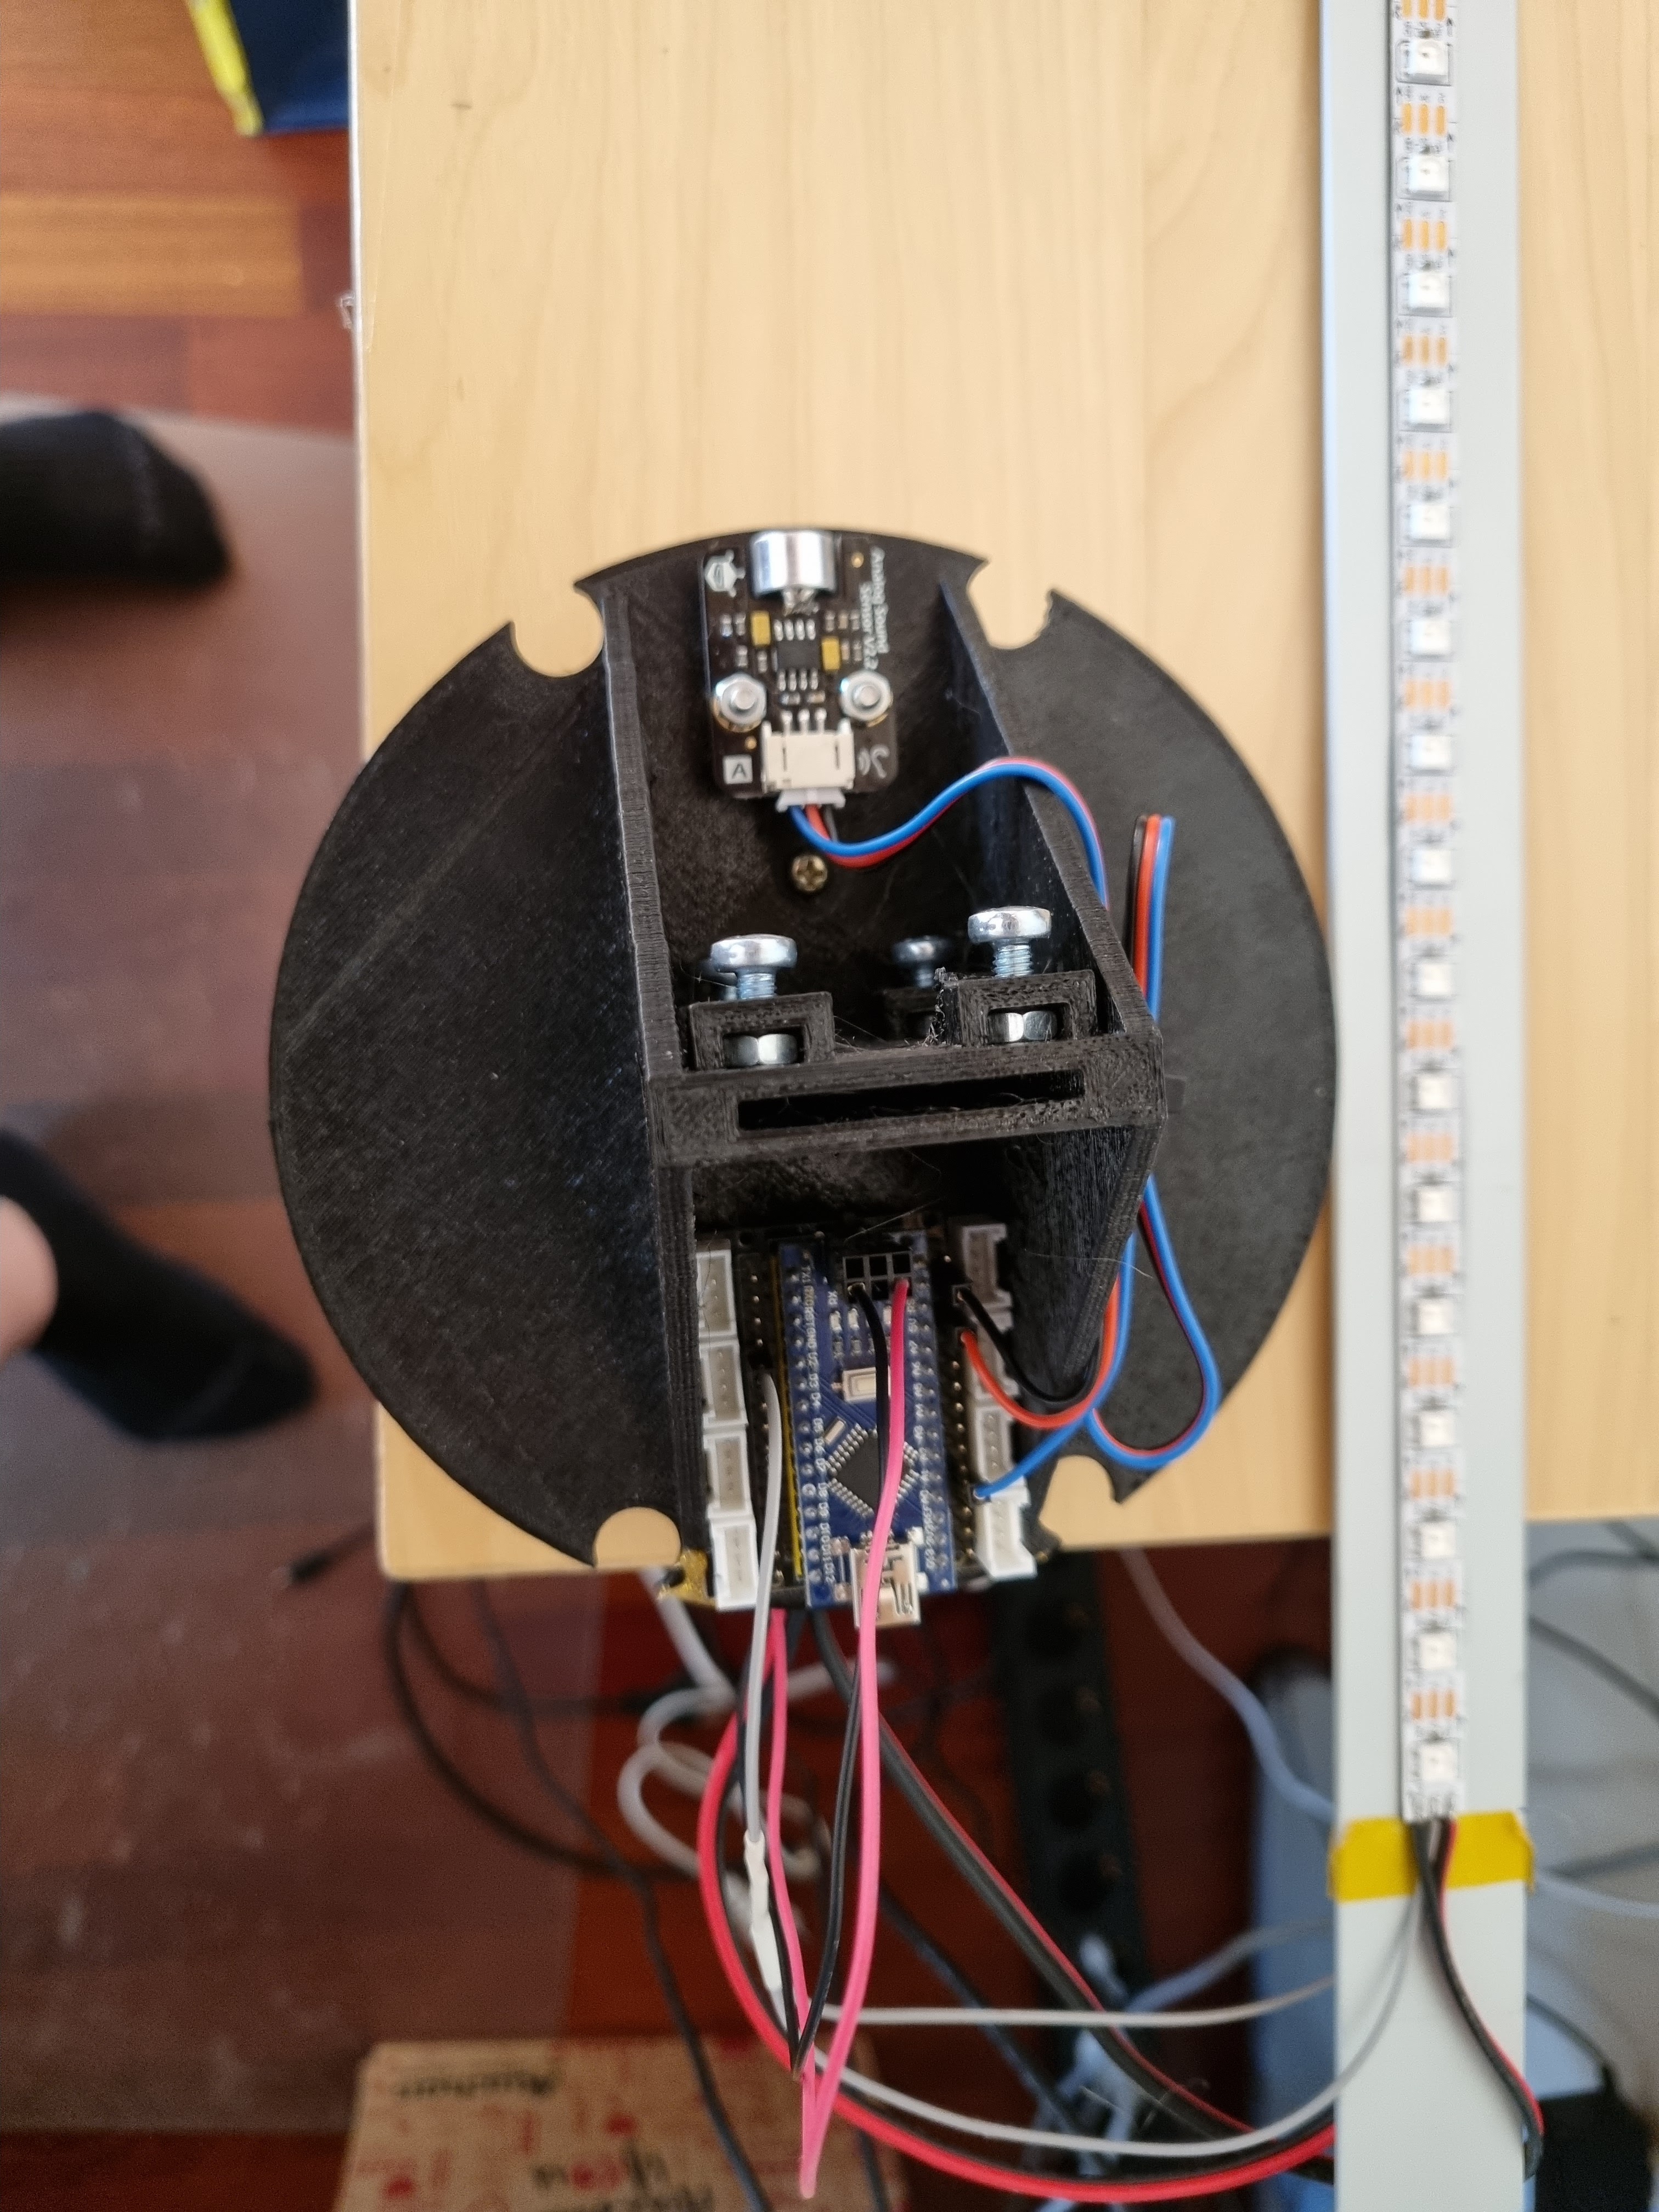
This project is just a simple, floor standing VU meter, using a microphone board, Arduino Nano, and WS2812 LED strip. Quite a simple one.

I had issues with the microphone board. I bought all together 7 different kind. It would be a long story the troubles I had with those (so not writing it today). Finally I choose one from DFRobot. Mainly because the two 3mm mounting holes, what perfectly fit into my design.

I don't want to write to much about it, so the pictures.

The finished "product" (first, just because it looks better when sharing on social media. 😂)


Bare electronics:

Assembled without the full enclosure:

How it is work (It is just her sisters yelling. I'm afraid, if I use some music on it, one of the YouTube's piracy dickheads ban it). It also has yellow and red, but unfortunately can't be seen on the video:

All of the elements (mainly code and the 3D design) can be found in this git repo. It also contains other VU meter related things, what is "work in progress" and not connected to this project:

https://gitlab.com/suf/suf-electronics-vu-meter

2017. április 18., kedd

Ergobag 1.

This is an old story. It dated back to the end of last summer. My two kids, who already in school has identical school backpacks but in different color.
These backpacks has a few places where stickers can be attached with velcro. The kids got some stickers with the bags, but these are just static ones.
Here came the idea. What if I create something personalized for them. Something with their own name, what even has some light in it.
So I needed a 3D Printed cage, with some electronics inside. To keep it simple I chosen an Attiny85 and APA102 LEDs.
I wanted something can be charged. To keep it as slim as possible, the normal AA or AAA size rechargeables was not really a good option (first I was thinking about, but finally I thrown the idea). So I chosen a Nokia BL-4C battery. There are two problems with it. You need a proper Li-Ion charger and as the LEDs need 5V, you need a boost converter to power it.
In addition I wanted to cut of the power after certain amount of time - Kids never switch of the toys.
So one push button for switch on, one for switch off if you want, and timed switch of by the MCU.
Here is the circuit:


I built this on a circular board:
(This is the first prototype, not the actual working one)


Then I designed a case for it.
Front:
Back:
Insert:

Actually I was able to print the 3D parts and assembled the whole thing, but I wasn't really happy with the result as I had continuous problems with the 3D printer (the Geeetech, as the Robo3D was completely dead)
Finally the signs appeared on the bags, and the kids were happy with it:


The project was closed...
...but, as you can expect kids, are kids, and they have schoolmates. So "orders" arrived - who else needs it. :-)
All of the design files are available on my github:
https://github.com/sufzoli/suf-electronics-ergobag
It has been cleaned up, so just the actual design is in there.
Continue...

2015. május 28., csütörtök

Bench Power Supply - Died

My Bench Power Supply died today. I tried to work with it and the CH2 went to CC mode immediately. When I turn the knob on it without load I can measure maximum 0.5V on it.
I've to find a schematic diagram for it (or just try to repair without it).


2015. május 13., szerda

DevEnv - LightUp - followup

It looks like my previous problems with LightUp gets handled.


Two days ago a Kickstarter update come. Two major things in it:
  • The public beta of the LightUp Code what is basically Scratch for Arduino what supports the LightUp MCU and in addition Arduino boards
  • The new Faraday Kit what contains the new LightUp MCU modul, what is programmable through Bluetooth. It looks like an iPad will be enough for programming, no desktop and driver hassle needed anymore
And yesterday also the new Kickstarter campaign for the Faraday kit started, what I put on the right side in the blog also.
Well done guys!

2015. április 5., vasárnap

Dev Env - LightUp

The story starts almost two years ago.
As my son gets older (8 years old now), I was thinking to teach electronics, programing or both to him somehow. As I looking around just pop up something called LightUp on the Kickstarter.

http://www.lightup.io

I immediately jumped in to it, hoping that I'll get it to Christmas of 2013.
It didn't happened. After long waiting I got the kit sometime in Autumn 2014. It became a Christmas present for 2014.
My son started to play with the electronics part of the kit but not touched the MCU module included. As he reached the point making all of the tasks was included in the iOS app (what is unfortunately not too much), I tried to setup the MCU.
It was something like two month ago, and it was a major failure. I had two problem with it. The first is theoretical. I don't believe that is the best language to teach an 8 year old to program is the C++ even it is the simpler arduino's one. The second is the driver.
LightUp partnered with codebender to provide programing environment to the kit. Codebender is nothing else just an online Arduino IDE. They provide a driver pack, what is able to connect to virtually every Arduino compatible board. But the driver pack was not working with the LightUp MCU on my desk.
The story was put aside in this point.
A few days ago I seen, that my son started to play with the LightUp kit. This was a good indication to put some further work into the setup.
Went to codebender, downloaded the driver installed it, and the result was the same as two month ago:
This time I wasn't stopped here:
After installing it the result:
Success!
Finally I went to the CodeBender side to try it. When I started the IDE for the LightUp a LED blinking project was showing up:
Just downloaded it to the board, and started to work:
Conclusion:
What I see about the LightUp: This is an unfinished something. After a good start they lost their tempo. The idea to check the circuit with a camera is exciting, but they got nothing more. A large amount of example circuits and a kid friendly programing environment is missing.
In addition tons of far better kits are exists on the market (for example littlebits), what is kid friendly and gives the possibility to grow further. This one not.