This will be more series of pictures than a build log.
This is how it looked like at arrival:
I didn't even touch the radio until July. Just ordered a few parts:
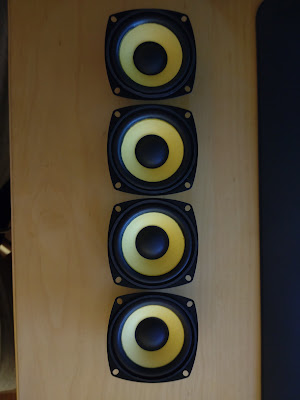
This never be a "Hi-Fi" equipment, so a $1.75 class-D power amplifier and four wide range speakers are good enough. According to my plans, I also added two SMPS power supplies a 24V and a 5V one (later even I had in one of my parts boxes already)
Disassembly
I throwed away everything I didn't need, to have place for the new things installed. My intention to keep only the things inside, what doesn't change the look and feel.
Removed the complete power supply section, the power amplifier and all of the tubes.
Also removed the front cover with the original textile and the loudspeakers.
Power amplifier/loudspeaker section
The textile was cracked and the whole wooden plate wasn't fit to my new speakers, so recreated from starch. Added two wooden plate instead of the original one. One for the front holdinging the textile, one for the back for the speakers.
Drilled the holes for the speakers.
The amplifier/speaker section assembled.
Glue the textile to the new wooden plate
Put back the original (plastic) frame
Assembled
Additional small things
I wanted to keep a few things from the original. The power switch, the volume knob, the backlight.
I guessed the backlight will be hard to find. Originally an E10 6.3V lamp was used (connected to the tube heater winding of the power transformer).
I was absolutely sure, I'll never find an E10 24V LED lamp:
AliExpress: - Hold my beer!
The power switch give me some headache. The original one was just partially working. Disassembled, but unable to fix it. So I crafted something into its place, what is not nice, but working (didn't have access to my 3D printer at that time, to create something better):
Controller
The controller should consist a Raspberry Pi (actually I had a few 3B, so used one), and a touch screen. Looked around, and from the reviews I choose a WaveShare 5" IPS, DSI, capacitive touch display (https://www.waveshare.com/product/raspberry-pi/displays/lcd-oled/5inch-dsi-lcd-b.htm).
It come out, just perfect. Worth every cent payed for it. Connected to the RPi with already installed RaspiOS, it just started to work. No software tweaking, no alignment, nothing.
From software perspective, I started from this project: https://learn.adafruit.com/raspberry-pi-radio-player-with-touchscreen
It gave some background on the mpd/mpc, but I didn't like the frontend (so rewrote it).
Other than installing the mpd and mpc, I only needed to setup the /etc/mpd.conf, with this configuration:
audio_output {
type "alsa"
name "My ALSA Device"
device "hw:0,0"
}
The others are handled by the Python code written. You also need this three Python packages: numpy, pygane, PyYAML
Controller mounting
Designed a mounting frame, what give the feeling of the original speaker grill, but can be opened to prevail the controller.
For the door lock I used the spring lock what can be used on many consumer electronics devices
The final assembly
https://gitlab.com/suf/suf-electronics-melodyn
I'm thinking about, to create a "spin-off" project from the Python code and create a full blown network radio + media player from it. But this is question of the future...


Nincsenek megjegyzések:
Megjegyzés küldése